Tag Archives: Assimp

Cross platform development for OpenGL, CUDA and friends

This is a small practical article about my development setup for Windows and Linux. I’m usually developing cross platform, because it doesn’t add much work and I’m switching from time to time between those systems. Both of them have advantages and disadvantages for me, but I don’t want to go into details here.

For version control I use Mercurial along with bitbucket. I prefer Mercurial over git for a simple reason, there is a very good open source GUI client for both operating systems, namely TortoiseHG. For git there are a few Windows clients, but I didn’t find any Linux one that I liked. Bitbucket is cool, because they provide the usual code hosting plans, mercurial and git hosting, optional bug tracker, wiki, code browsing and more.

The next thing is a cross platform build system: CMake. Most Linux and cross platform IDEs support it and it’s easy to generate a Visual Studio project out of it. Here is the code for the build file of my latest project. It includes OpenGL, CUDA and some other libraries. You can use it as a template.

project(firefly)

#this is my project structure
# ~/firefly/src/CMakeLists.txt   (this file)
# ~/firefly/src/main.cpp         (and other source files, there are also subdirectories)
# ~/firefly/data/..              (shaders, music, model data..)
# ~firefly/linlib/lib/..         (linux libs not installed on the system, usually .so and .a files)
# ~firefly/winlib/lib/..         (windows libs not installed on the system, usually .lib and .a files)
# ~/firefly/*inlib/include/..    (header files libs not installed on the system)
# ~/firefly/build/..             (not committed to the version control system, names vary, created by cmake.
                                  .dll files need to by copied here, there must be a cmake command which could do that but I did it manually)
# ~/firefly/documentation/..     (optional documentation, reports for uni etc.)

cmake_minimum_required(VERSION 2.6)
cmake_policy(SET CMP0015 OLD)

#find_package(Qt4 REQUIRED)
find_package(OpenGL REQUIRED)
find_package(CUDA REQUIRED)

#include_directories(${CMAKE_SYSTEM_INCLUDE_PATH} ${QT_INCLUDES} ${CMAKE_CURRENT_BINARY_DIR} ${CMAKE_CURRENT_SOURCE_DIR})
include_directories(${CMAKE_CURRENT_BINARY_DIR} ${CMAKE_CURRENT_SOURCE_DIR} ../include)

if(CMAKE_SYSTEM_NAME STREQUAL "Linux")
  link_directories(/usr/lib /usr/local/lib ../linlib/lib)

  # otherwise some bullet internal headers don't find friends..
  include_directories(/usr/local/include/bullet /usr/include/bullet ${CMAKE_CURRENT_SOURCE_DIR}/../linlib/include /usr/local/cuda/include)
else()
  #windows
  include_directories(${CMAKE_CURRENT_SOURCE_DIR}/../winlib/include ${CMAKE_CURRENT_SOURCE_DIR}/../winlib/include/bullet)
  link_directories(${CMAKE_CURRENT_SOURCE_DIR}/../winlib/lib)
endif()

set(project_SRCS
#list all source and header files here. separate files either by spaces or newlines
main.cpp
Class.cpp  Class.h
..
)

#shaders, optional, will be shown in the IDE, but not compiled
file(GLOB RES_FILES
../data/shader/Filename.frag
../data/shader/Filename.vert
)

#set(CUDA_NVCC_FLAGS ${CUDA_NVCC_FLAGS} -O3 --use_fast_math -gencode arch=compute_20,code=sm_21 --maxrregcount 32)
#set(CUDA_NVCC_FLAGS ${CUDA_NVCC_FLAGS} "--use_fast_math -gencode arch=compute_20,code=sm_20 -lineinfo -G")   #-G for cuda debugger
#set(CUDA_NVCC_FLAGS ${CUDA_NVCC_FLAGS} "--use_fast_math -gencode arch=compute_20,code=sm_21 -lineinfo")
set(CUDA_NVCC_FLAGS ${CUDA_NVCC_FLAGS} "--use_fast_math -gencode arch=compute_20,code=sm_21 -lineinfo --maxrregcount 32")

if(CMAKE_SYSTEM_NAME STREQUAL "Linux")
   #"-D VIENNA_DEBUG" defines the preprocessor variable VIENNA_DEBUG
#   set(CMAKE_CXX_FLAGS "-D VIENNA_DEBUG -D VIENNA_LINUX -std=c++11")
   set(CMAKE_CXX_FLAGS "-D VIENNA_LINUX -std=c++11")
   set(CUDA_NVCC_FLAGS ${CUDA_NVCC_FLAGS} " -std=c++11")
else()
   #"/DVIENNA_DEBUG" defines the preprocessor variable VIENNA_DEBUG
    #add_definitions(/DVIENNA_DEBUG)
    add_definitions(/DVIENNA_WINDOWS)
    SET( CMAKE_EXE_LINKER_FLAGS  "${CMAKE_EXE_LINKER_FLAGS}" )
endif()

#qt4_automoc(${project_SRCS})
#add_executable(firefly ${project_SRCS})
cuda_add_executable(firefly  ${RES_FILES} ${project_SRCS})

if(CMAKE_SYSTEM_NAME STREQUAL "Linux")
    set(LIBS ${LIBS} X11 Xxf86vm Xi GL glfw3 GLEW Xrandr pthread assimp BulletDynamics BulletCollision LinearMath fmodex64 freeimage gsl gslcblas ${CUDA_curand_LIBRARY})
	target_link_libraries(firefly ${LIBS})
else()
        set(LIBS ${LIBS} OpenGL32 glfw3 GLEW32 assimp fmodex64_vc FreeImage gsl cblas ${CUDA_curand_LIBRARY})
	target_link_libraries(firefly ${LIBS} debug BulletDynamics_Debug debug BulletCollision_Debug debug LinearMath_Debug)
	target_link_libraries(firefly ${LIBS} optimized BulletDynamics optimized BulletCollision optimized LinearMath)
	target_link_libraries(firefly ${LIBS} general BulletDynamics general BulletCollision general LinearMath)
endif()

And lastly you’ll need cross platform libraries. Fortunately there are quite good ones.

  • For GUI I use Qt, it can also open an OpenGL window, but if you don’t need GUI, it would be overkill.
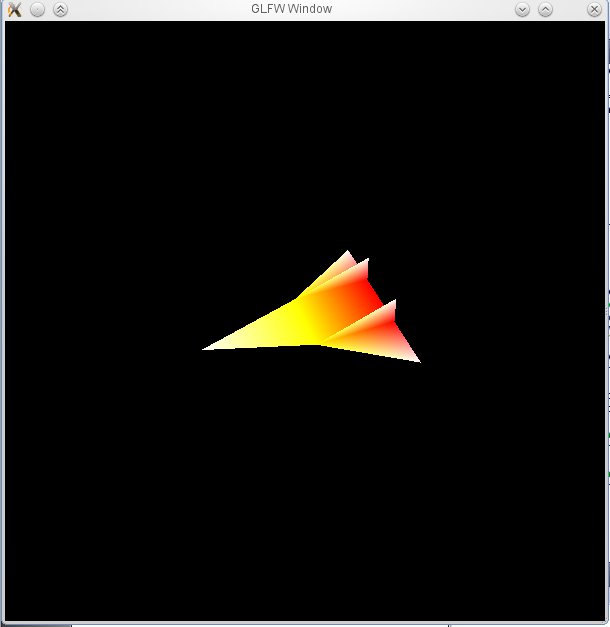
  • So for Chawah and Firefly I used GLFW, which simply opens a window and provides mouse and keyboard input.
  • Then you need an OpenGL extension loader, I used GLEW, but there are also other alternatives.
  • For math (everything connected to vectors and matrices) I can recommend GLM.
  • Assimp loads meshes, objects, animations and whole scene graphs, but it’s a bit buggy in certain areas and lacks certain features (only linear animations afaik, only simple materials and only basic lights (no area lights)). I didn’t find anything better though.
  • Then there is FreeImage which is a very easy to use image loader and exporter.
  • You can also check out the other libs from the CMake file..

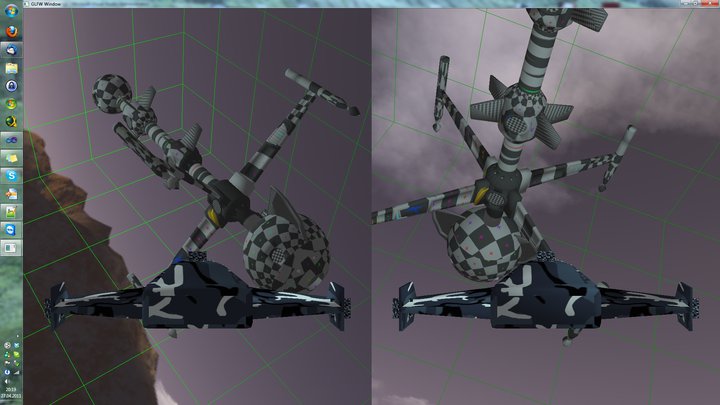
In case you want a working example, just download the firefly project. The project is quite big, I made a post about it. If you have any questions, then I’ll answer them in the comments..

Global illumination rendering using path tracing and bidirectional path tracing

This year I started a course on Advanced Computer Graphics in Aalto University by Jaakko Lehtinen. The focus was on methods for global illumination (GI). In a nutshell, global illumination means more realistic lighting compared to “traditional”, direct lighting, where light is reflected by all surfaces (including diffuse ones). Therefore the shading includes indirect light, colour bleeding, caustics etc. Think of a room with only one window and no additional light, the wall with the window will be also illuminated, but only by light that was reflected from the floor and other walls.

There are many methods of implementing GI, for instance photon mapping, instant radiosity, path tracing and bidirectional path tracing or the quite involved method of Metropolis light transport (MLT). It was obligatory to implement path tracing, but I implemented bidirectional path tracing in addition. As a bonus, I implemented both of the methods on the graphics card using the OptiX Framework from NVIDIA, but please don’t make the same mistake of using OptiX.

Path tracing

Path tracing means tracing a path from the camera, bouncing off of surfaces in a random direction, and doing so until the ray hits the light. On every bounce the reflectance function is used to calculate the amount of reflected light. For instance a red surface would reflect only red light, a white surface all of it and a black one nothing. Naturally one sample is not enough, several samples are taken per pixel and the average gives the actual colour. This results in an unbiased estimation of the colour at the pixel. The technical term for this is Monte Carlo integration.

There are many ways to speed up the convergence, I implemented the following (some of them reused for the bidirectional path tracer):

  • At every bounce one additional ray is shot into the direction of a light. This is especially important if the light source is small and hitting it randomly has a small probability. In order not to add the energy from the light twice, a random hit should be ignored.
  • The randomly reflected ray should not be sampled according to an uniform distribution, but to a distribution matching the reflectance function and a geometrical term (importance sampling). This gets even more important with a micro-facet model, which was used to simulate partly reflective surfaces (the same model was used for the normal path tracer and the bidirectional one).
  • Numbers from a random number generator tend to cluster, which is not optimal for Monte Carlo. A Low-discrepancy sequence is better, because the area of integration is covered more evenly. The Wikipedia Article about the Halton sequence shows the difference.

Bidirectional path tracing

Difference between bidirectional and normal path tracing (from Veach's PhD thesis).
Difference between bidirectional and normal path tracing (from Veach’s PhD thesis).

The idea of this method is quite simple, but the implementation is involved. Normal path tracing sometimes has difficulties to sample the light, especially when there are caustics or the light is a bit hidden as it is in the scene above. The reason in both cases is that it can’t be sampled directly (shooting a ray into the direction of the light) and hitting it randomly is improbable. More generally, normal path tracing has difficulties to sample important paths in certain situations, resulting in a noisy image.

Different bidirectional sampling techniques, taken from the Mitsuba documentation.

Bidirectional path tracing shoots rays from both directions, from the light and from the camera. This results in two paths consisting of vertices, the light and the eye/camera path. Then each camera vertex is connected to each of the light vertices, forming different paths for transporting light. Eric Veach calls them bidirectional sampling techniques. These techniques have different “fields of expertise”, meaning that certain techniques are only efficient for certain effects. The figure on the right shows a collection of such sampling techniques.

In order to compile them into an image, they are weighted and added up. Computing the weight is a bit complex, but basically it’s computing the probability of generating the specific path divided by the sum of generating any path with vertices at the same positions. This results in switching off the techniques for effects that they can’t sample efficiently and therefore results in an image with less noise. This can be observed in the bottom part of the figure on the top right. The technical term is multiple importance sampling and is also covered in depth in Veach’s thesis.

After implementing the base of the algorithm with perfectly diffuse surfaces, I also added perfectly refractive and reflective surfaces as well as micro facet type surfaces (math taken from here).

Sub Surface Scattering

Finally I also implemented sub surface scattering. This book contains an excellent explanation of it (the papers (1, 2) by Jensen et al. aren’t so good in my opinion). I chose the accelerated version of the algorithm. This means that I have an octree containing surface points of cached irradiance. It seemed like this is not so cool as expected, the cache needs a lot of space in memory and the objects are lacking the montecarlo noise, which makes them look a bit odd. Blender’s renderer, Cycles, also doesn’t use the acceleration structure, instead they sample the surface directly. If I ever have to implement SSS another time, I’ll do it the Blender way. But for this project I chose to use a hack: In order to fix the unusual look, I mixed in the normal diffuse reflection. So a SSS surface is now 50% SSS and 50% perfectly diffuse.

Results

Because I implemented so many features, I didn’t have enough time to choose nice scenes.

There is one Pangolin, based on a model made by my sister:

Rendering of a Pangolin
The body contains a term for SSS, it filled up the video memory almost completely: 96%.

then there is the famous Sponza:

Sponza, featuring a simple path tracer and diffuse surfaces

and finally a demo scene for the bidirectional tracer:

Bidirectional Test Scene
The glass was modeled by me, the rest are primitives from Blender. The scene features caustics, reflective and refractive surfaces, micro-facet model surfaces, some lights and diffuse surfaces.

Code

I was asked to provide the code. Since the project is based on the OptiX Samples framework and the framework has a proprietary license, I can’t give you the full project. Instead I made a diff to the sample directory provided with OptiX 3.0 (as this was the current version when I started coding).

To make it work you need:
1. download OptiX 3.0
2. apply the patch, under Linux it should be possible with the patch tool, something similar should exist on windows
3. if you want to compile and execute my code, download and compile Assimp and FreeImage (the dll’s and header files are assumed to be in folders next to the project folder)
4. follow the instructions in the readme file.

If you have any questions or problems with compiling, feel free to contact me. Preferable via the answer function, so others can also benefit..

Here is the patch.

First chawah screenshots

Unfortunatly I hadn’t time for Krita any time recently. I had to work and do stuff for university. I will focus more on Krita in summer again..

This term i’m attending the second computer graphics course in my university. The goal is to program a 3d game in OpenGL. We (Felix and me) chose to program a split screen flight duel game, as this is a simple game concept, but it’s still very extensible graphics and game logic wise.

The first step was to setup OpenGL etc. (GLEW, GLFW), which produced this first screen shot in begin of April.
First Chawah screen shot

We have worked hard and now we have implemented model loading (Assimp), shading, texturing, controls and split screen. Looks good for our first deadline :)
First Chawah screen shot

Next steps will be to implement some more game logic, in game display of hull state, frags and menu and then physics. We will use CEGUI and Bullet for these tasks..