Tag Archives: OpenGL

Mixing OpenGL with Ray Tracing via NVIDIA CUDA for indirect lighting effects

This post is about a demo called Firefly for a course in Vienna University of Technology. The goal was the create a graphics demo, meaning a program with 3d animation which runs in real time, without user interaction, for few minutes and shows interesting graphic effects.

This is what I got (there is HD): Watch on YouTube
Notice that there are only two traditional lights (lamps). The arcade is mostly lit by indirect light, the cubes are shining from every point on the surface.

And I’m quite proud that I won the first place in the course’s contest :D

Now that you’ve seen the video, I’d like to talk a bit about the technology. In the end there is a conclusion, which you shouldn’t skip. Finally there is information on how to retrieve the code and executables.

Technology

I implemented a deferred rendering system using OpenGL and CUDA. The bouncing cubes are computed with Bullet by simply applying random forces. There are two main spot lights computed via shadow maps, indirect light is computed via ray tracing.

All geometry and texture information is rendered into a buffer on the GPU using OpenGL. The shadow maps are also rendered by OpenGL. Until here it is a standard deferred rendering system and therefore I’ll skip the details. Those buffers are then passed to CUDA, where the shading happens. This shading stage is divided into several CUDA kernels.

  • The first is doing the ray tracing.
    It is path tracing with only two bounces:
    camera —–> surface —–> surface —–> light.
    The first ray from the camera is not computed and taken from the geometry buffer instead. The last ray isn’t computed as well and taken from the shadow map instead. So only the middle ray is traced. Since indirect light usually contains only low frequencies, it is possible to compute it only in half of the resolution with only very little quality impact and big performance gain. On the half resolution image, 2-16 rays are computed per pixel (in the download you’ll find several executables, the quality refers to the number of rays per pixel. If I remember correctly, 4 rays per pixel were used for the video, this runs in real time (>30fps) on a modern GPU). For ray tracing itself I adapted a highly optimised kernel developed by Finnish NVIDIA engineers, along with a good BVH builder from the same source.
  • The next kernel filters the result from the ray tracing kernel. This filter is blurring, but it takes normals and distance into account, so that indirect light doesn’t get blurred over edges. The filter is not separable into a horizontal and vertical pass, because of the additional information taken into account. There were bandwidth and latency issues with the kernel and so I had to put quite some effort into optimising it.
  • Finally there is the main shading kernel, which computes the traditional shading and adds the indirect light. This is quite strait forward, there is just a little catch. Since the indirect light is computed in a lower resolution, in some cases there where ugly aliasing effects. Imagine a dark polygon in the foreground and a bright, indirectly lit one in the background. This situation would result in 2×2 steps across the edge. This is alleviated by another blurring stage, which takes normals and distance from the higher resolution buffer into account. So on pixels on polygon edges, which would take the colour of the underlying 2×2 block from a different polygon before, now the filtering would only take the colour from the correct polygon.

After the CUDA part finished, the buffers are handed back to OpenGL for post-processing: basic tone mapping, bloom, lens flares. Since I based firefly on a previous project’s OpenGL engine, those effects were already implemented. I won’t go into details because the effects are pretty standard and there are already a lot of sources.

Conclusion

Ok, so usually one should write how cool it was and how good the method worked. I’m an honest person: It was cool to program, I learned really a lot, I won the first place, I don’t regret, but the approach is bad, don’t try it out :), here is why:

My university tutors feared that the switch between OpenGL and CUDA would be too expensive, but this was not the case. Naturally there are costs, but those are way under 1 ms (unpacking geometry data and writing the output in CUDA costs about 1 ms, which includes already some computation work, while ray tracing takes around 30 ms). So this was the positive side: you can switch between OpenGL and CUDA every frame, if you do it right, the performance will be OK.

But to understand why the approach is only mediocre, one needs to understand how ray tracing performs on the GPU. Almost parallel rays are fast, random rays are slow. The reason is that “similar” rays will need mostly the same elements from the Bounding Volume Hierarchy, execution and data divergence will be low. Random rays are the opposite. That’s why it’s possible to get more than 60 fps when shooting only primary rays, while shooting just one random ray per pixel from the surface originally brought the performance to under 10 fps. Similarly it should be possible to compute rays from the lamps to the surface in a fast way, but it might include sorting and I didn’t test that.

So the approach from above accelerates the fast part of a 2 bounce path tracing algorithm, but the slow part – computing a random ray from one surface to another – stays slow.

It would be much better – from a software engineering perspective – not to mix ray tracing and the traditional pipeline in this case, because costs are to high compared to the benefits. A lot of data is duplicated on the graphics card, it is cumbersome to program, tradeoffs make performance okeyish, but quality is not great (look at the flickering and noise). It’s just not production ready and it will never be. It’s better to wait another couple of years until GPUs will be fast enough to do real path tracing in real-time.

While starting to program, I was also thinking of implementing caustics. Those could produce really nice effects and be over 60 fps – depending on the quality of the caustics, which could justify ray tracing. If somebody tries that, please let me know about it in the comments. In my case I couldn’t do it due to time constraints.

On a side note, I wasn’t thinking about NVIDIA OptiX due to past experiences with it. I was quite satisfied with CUDA, a ray tracing library would be cool, but that’s a pretty big wish : )

Code and Executable

You can use my old repository directly. The last version of the demo code is tagged, there are a few more revisions for another lecture’s submission.

I have packed everything together into a zip file. There are Windows and on Linux versions. You’ll need an NVIDIA graphics card and recent drivers. You might also need CUDA and you might need to delete the CUDA library files, it’s hard to deploy to unknown systems, do whatever works for you :) . I used CUDA 6.5..

Cross platform development for OpenGL, CUDA and friends

This is a small practical article about my development setup for Windows and Linux. I’m usually developing cross platform, because it doesn’t add much work and I’m switching from time to time between those systems. Both of them have advantages and disadvantages for me, but I don’t want to go into details here.

For version control I use Mercurial along with bitbucket. I prefer Mercurial over git for a simple reason, there is a very good open source GUI client for both operating systems, namely TortoiseHG. For git there are a few Windows clients, but I didn’t find any Linux one that I liked. Bitbucket is cool, because they provide the usual code hosting plans, mercurial and git hosting, optional bug tracker, wiki, code browsing and more.

The next thing is a cross platform build system: CMake. Most Linux and cross platform IDEs support it and it’s easy to generate a Visual Studio project out of it. Here is the code for the build file of my latest project. It includes OpenGL, CUDA and some other libraries. You can use it as a template.

project(firefly)

#this is my project structure
# ~/firefly/src/CMakeLists.txt   (this file)
# ~/firefly/src/main.cpp         (and other source files, there are also subdirectories)
# ~/firefly/data/..              (shaders, music, model data..)
# ~firefly/linlib/lib/..         (linux libs not installed on the system, usually .so and .a files)
# ~firefly/winlib/lib/..         (windows libs not installed on the system, usually .lib and .a files)
# ~/firefly/*inlib/include/..    (header files libs not installed on the system)
# ~/firefly/build/..             (not committed to the version control system, names vary, created by cmake.
                                  .dll files need to by copied here, there must be a cmake command which could do that but I did it manually)
# ~/firefly/documentation/..     (optional documentation, reports for uni etc.)

cmake_minimum_required(VERSION 2.6)
cmake_policy(SET CMP0015 OLD)

#find_package(Qt4 REQUIRED)
find_package(OpenGL REQUIRED)
find_package(CUDA REQUIRED)

#include_directories(${CMAKE_SYSTEM_INCLUDE_PATH} ${QT_INCLUDES} ${CMAKE_CURRENT_BINARY_DIR} ${CMAKE_CURRENT_SOURCE_DIR})
include_directories(${CMAKE_CURRENT_BINARY_DIR} ${CMAKE_CURRENT_SOURCE_DIR} ../include)

if(CMAKE_SYSTEM_NAME STREQUAL "Linux")
  link_directories(/usr/lib /usr/local/lib ../linlib/lib)

  # otherwise some bullet internal headers don't find friends..
  include_directories(/usr/local/include/bullet /usr/include/bullet ${CMAKE_CURRENT_SOURCE_DIR}/../linlib/include /usr/local/cuda/include)
else()
  #windows
  include_directories(${CMAKE_CURRENT_SOURCE_DIR}/../winlib/include ${CMAKE_CURRENT_SOURCE_DIR}/../winlib/include/bullet)
  link_directories(${CMAKE_CURRENT_SOURCE_DIR}/../winlib/lib)
endif()

set(project_SRCS
#list all source and header files here. separate files either by spaces or newlines
main.cpp
Class.cpp  Class.h
..
)

#shaders, optional, will be shown in the IDE, but not compiled
file(GLOB RES_FILES
../data/shader/Filename.frag
../data/shader/Filename.vert
)

#set(CUDA_NVCC_FLAGS ${CUDA_NVCC_FLAGS} -O3 --use_fast_math -gencode arch=compute_20,code=sm_21 --maxrregcount 32)
#set(CUDA_NVCC_FLAGS ${CUDA_NVCC_FLAGS} "--use_fast_math -gencode arch=compute_20,code=sm_20 -lineinfo -G")   #-G for cuda debugger
#set(CUDA_NVCC_FLAGS ${CUDA_NVCC_FLAGS} "--use_fast_math -gencode arch=compute_20,code=sm_21 -lineinfo")
set(CUDA_NVCC_FLAGS ${CUDA_NVCC_FLAGS} "--use_fast_math -gencode arch=compute_20,code=sm_21 -lineinfo --maxrregcount 32")

if(CMAKE_SYSTEM_NAME STREQUAL "Linux")
   #"-D VIENNA_DEBUG" defines the preprocessor variable VIENNA_DEBUG
#   set(CMAKE_CXX_FLAGS "-D VIENNA_DEBUG -D VIENNA_LINUX -std=c++11")
   set(CMAKE_CXX_FLAGS "-D VIENNA_LINUX -std=c++11")
   set(CUDA_NVCC_FLAGS ${CUDA_NVCC_FLAGS} " -std=c++11")
else()
   #"/DVIENNA_DEBUG" defines the preprocessor variable VIENNA_DEBUG
    #add_definitions(/DVIENNA_DEBUG)
    add_definitions(/DVIENNA_WINDOWS)
    SET( CMAKE_EXE_LINKER_FLAGS  "${CMAKE_EXE_LINKER_FLAGS}" )
endif()

#qt4_automoc(${project_SRCS})
#add_executable(firefly ${project_SRCS})
cuda_add_executable(firefly  ${RES_FILES} ${project_SRCS})

if(CMAKE_SYSTEM_NAME STREQUAL "Linux")
    set(LIBS ${LIBS} X11 Xxf86vm Xi GL glfw3 GLEW Xrandr pthread assimp BulletDynamics BulletCollision LinearMath fmodex64 freeimage gsl gslcblas ${CUDA_curand_LIBRARY})
	target_link_libraries(firefly ${LIBS})
else()
        set(LIBS ${LIBS} OpenGL32 glfw3 GLEW32 assimp fmodex64_vc FreeImage gsl cblas ${CUDA_curand_LIBRARY})
	target_link_libraries(firefly ${LIBS} debug BulletDynamics_Debug debug BulletCollision_Debug debug LinearMath_Debug)
	target_link_libraries(firefly ${LIBS} optimized BulletDynamics optimized BulletCollision optimized LinearMath)
	target_link_libraries(firefly ${LIBS} general BulletDynamics general BulletCollision general LinearMath)
endif()

And lastly you’ll need cross platform libraries. Fortunately there are quite good ones.

  • For GUI I use Qt, it can also open an OpenGL window, but if you don’t need GUI, it would be overkill.
  • So for Chawah and Firefly I used GLFW, which simply opens a window and provides mouse and keyboard input.
  • Then you need an OpenGL extension loader, I used GLEW, but there are also other alternatives.
  • For math (everything connected to vectors and matrices) I can recommend GLM.
  • Assimp loads meshes, objects, animations and whole scene graphs, but it’s a bit buggy in certain areas and lacks certain features (only linear animations afaik, only simple materials and only basic lights (no area lights)). I didn’t find anything better though.
  • Then there is FreeImage which is a very easy to use image loader and exporter.
  • You can also check out the other libs from the CMake file..

In case you want a working example, just download the firefly project. The project is quite big, I made a post about it. If you have any questions, then I’ll answer them in the comments..

Chawah, Final update a little latish..

I had lots of things to do, no time etc etc. You know the excuses. But now I want to write another blog about a new Lindenmayer brush for Krita, and though have the motivation to catch up with old posts..

Well, we added loads of new features, mainly graphical ones:

  • lens  flares and sun dazzle effect
  • moving space dust (white circles), which are moving randomly, this is an simple particle system.
  • explosion and fire stream effects (more complicated particle systems)
  • environment mapping (on the ships and station)
  • bloom
  • music and sound effects
  • some power ups (armor, rockets, boost)

Here is the video that we made for the presentation.

Chawah Progress

More than one month since my last post and we (Felix and me) are quite satisfied with our progress. There is some basic game logic (you can destroy the other ship and then the game restarts), health display and physics. We got all points at our first submission and currently we are starting implementing the effects. Environment mapping is already in place.

I’ve made a short video, where you can see bullet physics in action (at the end of the video you can see bullet debug mode enabled).

First chawah screenshots

Unfortunatly I hadn’t time for Krita any time recently. I had to work and do stuff for university. I will focus more on Krita in summer again..

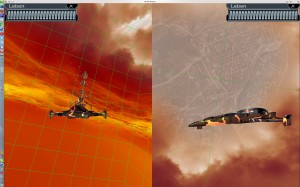
This term i’m attending the second computer graphics course in my university. The goal is to program a 3d game in OpenGL. We (Felix and me) chose to program a split screen flight duel game, as this is a simple game concept, but it’s still very extensible graphics and game logic wise.

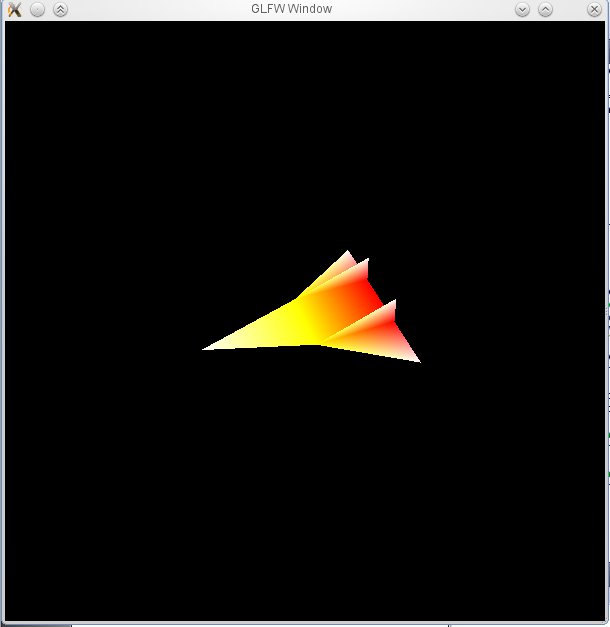
The first step was to setup OpenGL etc. (GLEW, GLFW), which produced this first screen shot in begin of April.
First Chawah screen shot

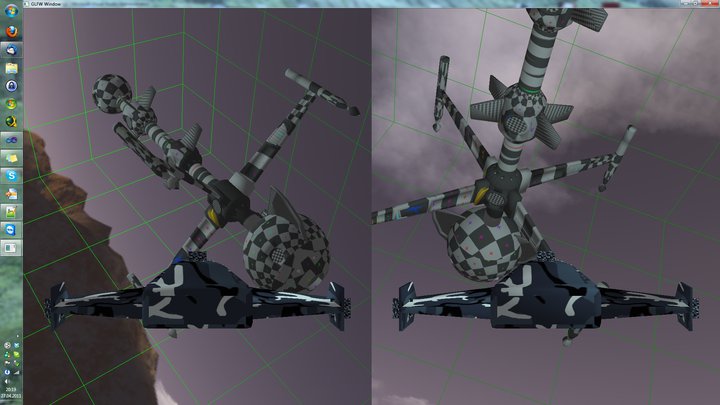
We have worked hard and now we have implemented model loading (Assimp), shading, texturing, controls and split screen. Looks good for our first deadline :)
First Chawah screen shot

Next steps will be to implement some more game logic, in game display of hull state, frags and menu and then physics. We will use CEGUI and Bullet for these tasks..